Ahhh, Mozzarella. Oozing out of a freshly baked eggplant parmesan, a lasagna, or melted on a pizza, Mozzarella makes everything better. This versatile, mild cheese originated in southern Italy and has become one of the most beloved cheeses in America (string cheese, anyone?). What differentiates Mozzarella from cheeses is it’s high moisture content and pulled layers that make up the texture we all crave.
The traditional method for making Mozzarella cheese starts with buffalo milk and is called Mozzarella di Bufala. Buffalo milk is prized for its higher fat and protein content. It requires less milk to make the same amount of cheese, and yes, you can taste the difference. If you live in the Bay Area, take a trip to Ramini Mozzarella in Tomales, CA where Audrey is the only cheesemaker in the United States making traditional Mozzarella di Buffalo with milk from her rock-star water buffalos. She gives a two hour tour complete with tastings. Bring a picnic and don’t forget to pet the baby water buffalo! Click here for information on tours.
Alas, most of us don’t have buffalo milk readily available, but you can still make a fine Mozzarella or Burrata with cows milk. In August I took a class to learn how at the San Francisco Cheese School (it’s really a thing and it’s awesome!). The three hour class went over how to make curd, the science behind cheese making, and finally, stretching and forming the curds into beautiful balls of shiny Mozzarella. My instructor, Sacha, was extremely enthusiastic and did a wonderful job teaching a lot in a very short period of time. Per Sacha’s recommendation, we each ate the first ball of Mozzarella that we formed. Mozzarella as I knew it became a distant memory. Fresh Mozzarella, and I mean Mozzarella that you eat within the first 40 minutes of making it, is a true thing of beauty. So, I was hooked. I immediately purchased everything I needed to make cheese at home.


At home, looking at my thermometer, cheese cloth, prep bowls, citric acid and rennet I’ll admit I felt a little discouraged. Yes, I had watched while the instructor showed us how to make curd, but somehow on my own in my kitchen it seemed like a lot to take on. Luckily we had company that night and my friend generously offered to help so at least if it came out terrible, we would be able to console each other. Luckily, the curd turned out beautifully and we went on to stretching and forming Mozzarella balls. Before you begin it’s good to know that a half gallon of milk will yield about 4 medium sized Mozzarella balls, take about two hours to make from start to finish, and take less that two minutes for all your hard work to be eagerly devoured. Still, it will be a deliciously satisfying two minutes and I promise you will be hooked on making Mozzarella cheese. I have made homemade Mozzarella about four times now and each batch of curd has been slightly different but all the Mozzarella has been perfectly tasty. Oh, and did I mention that you get to use super fun measurements like a 1/32 of a teaspoon technically known as a “Smidgen”?


Moral of the story, if you even have the slightest desire to make Mozzarella at home, don’t hesitate! Take a class or for the very brave just follow the recipe below! Happy cheese making!
Homemade Mozzarella
Ingredients:
- 1/2 gallon Straus Family Creamery whole milk (the milk is extremely important try to get the freshest milk possible and it must be non-homogenized!
- 3/4 tsp citric acid
- 1/32 tsp double strength rennet
- Salt for sprinkling
Equipment needed:
- 1 thermometer
- 1 large pot
- 1 slotted spoon
- 1 colander
- 1 knife (or I used an icing knife)
Instructions:
- Add your citric acid to 1/4 cup cool water and stir until dissolved.
- Pour your milk into a pot (you may need a knife to get through the cream layer on your Straus milk) and stir vigorously while adding the citric acid solution.
- Turn your burner on to medium and stir constantly until the milk temperature is 90°F.
- Add 1/32 tsp double strength rennet to another 1/4 cup water .
- Stir rennet solution into pot, remove from heat, and stir from bottom to top, gently for 15 seconds. You do not want to over disturb the rennet.
- Leave pot undisturbed for 15 minutes.
- When you come back you should have curd. You’ll know if it resembles a thick custard and when you run your icing knife along the side it separates from from the side of the pot. Also you’ll notice the yellow colored Whey coming up the sides of the curd.
- Cut a 1″ grid through your curd from the bottom of the pot to the top (see picture above) and let curd rest for an additional 2 minutes.
- Begin to very gently lift the curds with your slotted spoon, gently pushing them from one side of the pot to the other. You don’t have to but you can reheat your curd back to 90° at this time, it can help to solidify the curd but also runs the risk of curd that is too tough. This process should take about 5 minutes.
- Once all the curd is submerged under the whey, place a cheese cloth lined colander over a bowl and ladle your curds onto the cheese cloth, leaving the whey. Allow the curd to rest for about 15 minutes. Once it has the consistency of a bread dough and there are no pockets of water, your curd is ready to cut.
- Cut curd into cubes. I let my curd rest for about 20 minutes before making Mozzarella.
- Once you’re ready to make Mozzarella, hear the whey to 170°-180°F in your pot. Once it reaches that temperature scoop some into a small bowl and add some pieces of curd. You will add as much curd as the size ball you want to make. To make 4 Mozzarella balls, I used about 4 pieces of curd per ball. Let curd rest in the water for 30 seconds to 1 minute then pull out to test it’s elasticity. The curd should stretch easily but not break. You’re also looking for a smooth texture.
- NOTE: Make sure that your water is consistently between 160°F and 180°F. Water that gets too cool has ruined many a good Mozzarella!
- Your goal in forming the Mozzarella is to make layers so you very gently stretch the curd and fold it again. Stretch and fold, stretch and fold. If it’s not stretching easily (almost on it’s own) then you need to put it back in the hot water. Do not stretch and fold more than 4 times or the Mozzarella will be tough.
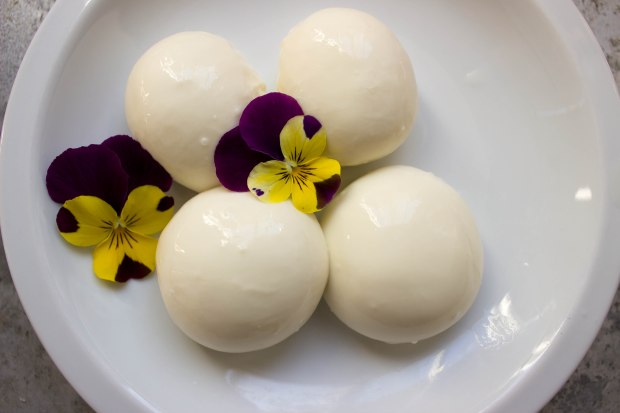
- Once you’re done folding and the curd is looking shiny you’re ready to form a Mozzarella ball. With your right hand form a tight ring with your index and thumb and with your left hand push the curd through so you make a shiny ball. This part takes practice and if you’ve never done it or never seen it I highly recommend checking out some videos online!
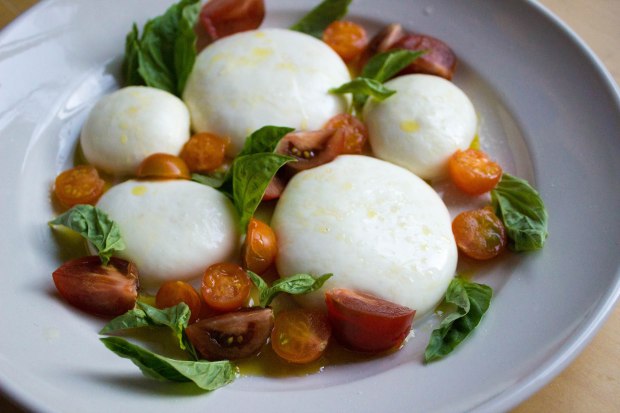
- If you’re ready to eat, place your beautiful Mozzarella balls on a lightly salted surface and enjoy! If you want to keep them a bit what I’ve been doing it storing them in a container covered with the cooled down whey. This also helps the Mozzarella retain it’s shape. Should be eaten within a few days.
- Another tip, if you have citrus or tomato plants, you can use your leftover whey to water once it’s cool. These plans like the high acidity of whey.
I hope you enjoy cheesemaking as much as I do! Bon Appétit!

